darktable preset inspired by LomographyLomoChrome Turquoise
False-color look: blue skies turn orange, skin and warm tones turn blue, greens turn turquoise.
- Film
- GA — 039 · sheet, datasheet, sources
- Pack
- Full pack
- darktable
- 5.6 or later
- In darktable
- Styles › Pellicules › Effets
- File
- Pellicules - Effets - LomoChrome Turquoise.dtstyle
A darktable 5.6 style built from LomoChrome Turquoise reviews (no datasheet exists): native modules, no LUT, measured on real RAW files. In the full pack.
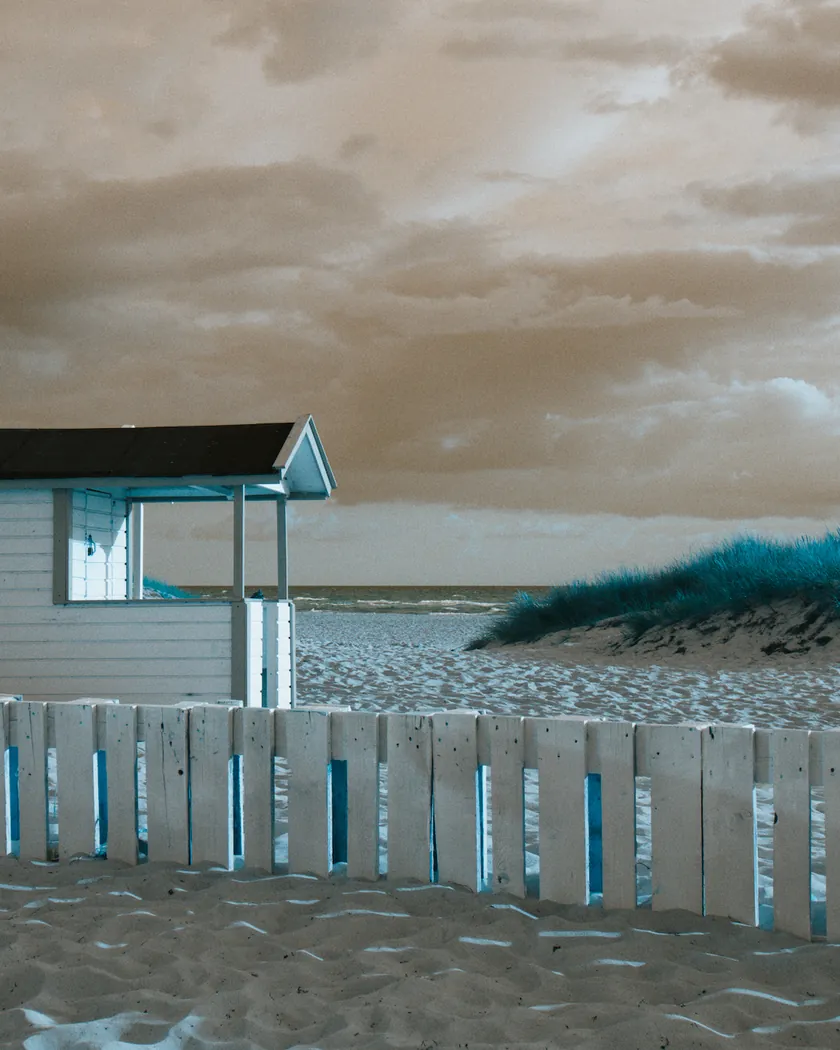
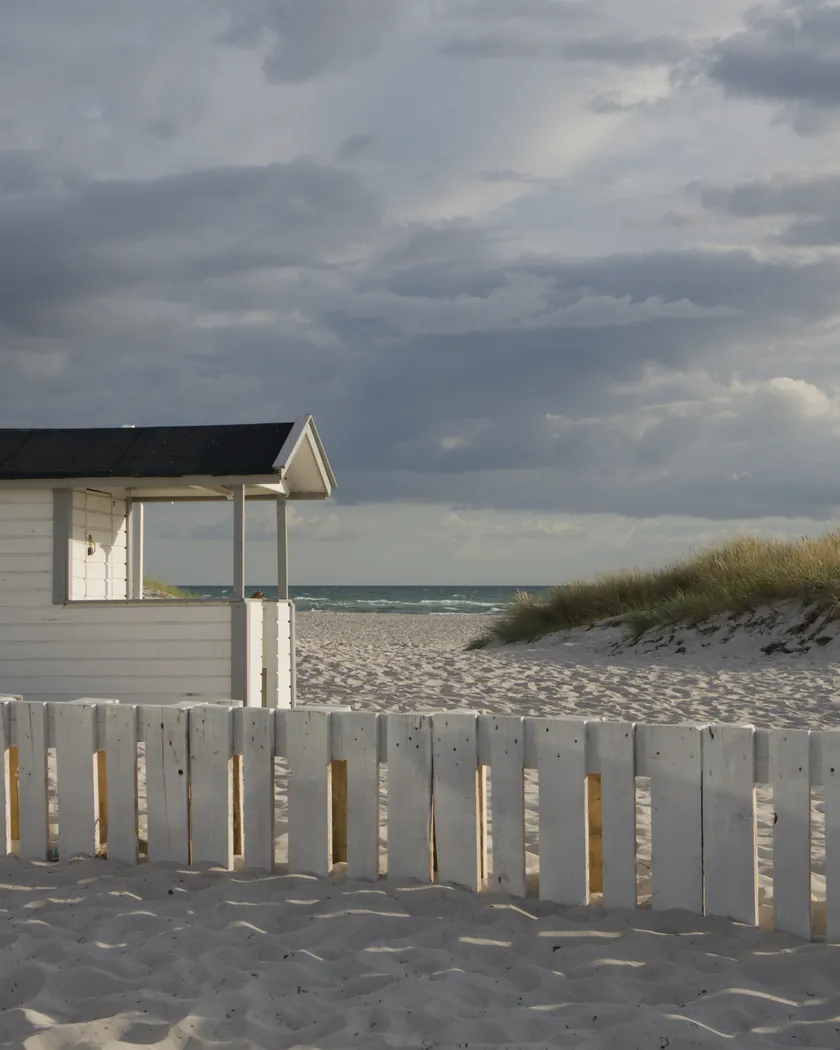
Translation into darktable
| Module | Role | Settings |
|---|---|---|
| rgb primaries | Approximate red–blue swap with green pushed toward cyan: skies and sea turn orange; skin, yellows and oranges turn blue; reds turn purple; greens turn turquoise | Blue hue +2.50 rad, purity 1.1; red hue −1.90 rad, purity 1.1; green hue +0.55 rad |
| color balance rgb (instance “film”) | Slight green-cyan tint in the shadows, very saturated colors | Shadows 120° / 0.03; saturation +15 %, vibrance +0.15 |
| color equalizer | Slightly more golden, less brown orange sky; more cobalt skin and blues | Orange: hue +3°, saturation ×1.05; yellow: hue +8°; blue: hue −8°, saturation ×1.15 |
| tone curve (RGB, per channel) | Stronger contrast, blocked shadows, burning highlights | Nodes (0, 0) (0.1, 0.065) (0.25, 0.20) (0.5, 0.51) (0.75, 0.81) (0.9, 0.95) (1, 1) |
| grain | Grain of an ISO 400 color negative, sharp, present without being heavy | Coarseness 1500, strength 20, midtones bias 75 |
Measurements
The measurements come from a few test photos of our own, which are not published on this site. The photos shown here are different.
| Photo | Zone | Baseline | Metric | Before | After | Film expectation |
|---|---|---|---|---|---|---|
| 0775 | whole image | Base rendering | L (lightness) | 53.2 | 62.8 | Highlights burn easily |
| 0775 | whole image | Base rendering | C (chroma) | 21.4 | 31.7 | Strong saturation, colors that glow |
| 1014 | whole image | Base rendering | Lsd (contrast) | 30.7 | 33.7 | Mid to strong contrast |
| 1014 | whole image | Base rendering | L95 (highlights) | 87.9 | 93.4 | Highlights burn easily |
| 0775 | sky | Base rendering | C (chroma) | 27.5 | 40.8 | Strong saturation |
| 0775 | sky | Base rendering | h (hue, °) | 273.6 | 70.5 | Blues in shades of orange |
| 0775 | sea | Base rendering | h (hue, °) | 270.1 | 74.2 | Blues glowing in golden hues |
| 0989 | skin | Base rendering | C (chroma) | 16.4 | 18.0 | Skin renders blue |
| 0989 | skin | Base rendering | h (hue, °) | 44.2 | 265.0 | Skin renders blue |
| 1014 | pink T-shirt | Base rendering | h (hue, °) | 358.8 | 315.2 | Reds become purple |
Base rendering: darktable’s default processing of the RAW file, without the preset. Luminance conversion (black and white): the same photo converted with plain luminance weights, to isolate the effect of the film’s spectral sensitivity.
What the style changes
The style sets five darktable modules. Lomography publishes no datasheet, so it rests entirely on reviews, summarized on the LomoChrome Turquoise film page. All figures below come from renders made with darktable-cli 5.6.0 at 1000 px, measured in CIELab. There is no t3mujinpack reference for this film.
- An approximate red–blue swap. The model is built from the descriptions, not measured on the film: blue goes to orange, red, yellow, orange and skin go to blue, cobalt or purple, green goes to turquoise, and grays and whites stay unchanged. This is the counterpart of the LomoChrome Purple style, where green and blue trade places instead.
- Done in rgb primaries. The module runs after your color calibration, so grays stay neutral (C = 0.0 on the light gray and the white of the chart). The blue primary is rotated to the orange position, the red primary toward blue, and the green primary toward cyan.
- Test photos. The sky turns orange (hue 273.6° → 70.5°) and more saturated (C 27.5 → 40.8); the sea goes from 270.1° to 74.2°. Skin turns blue (44.2° → 265.0°, C 16.4 → 18.0). A pink T-shirt goes from 358.8° to 315.2°.
- A synthetic sRGB chart of 16 patches, because the test photos contain little vegetation and little yellow (hue in degrees, before → after; only the direction of the shift matters):
- foliage 106 → 220, grass 136 → 186, bright green 138 → 180: greens turn turquoise; the olive foliage turns dark blue-green;
- sky 277 → 73, pure blue 298 → 63: blue turns orange;
- yellow 97 → 225, orange 62 → 279, skin 58 → 252: warm colors turn blue;
- red 36 → 302, pink 5 → 311: reds turn purple;
- light, mid and dark grays: C 0 / 0 / 0 before, C 0.0 / 1.9 / 2.4 after (hue about 135°).
- Stronger contrast, brighter highlights. Contrast rises (Lsd 30.7 → 33.7 on photo 1014, and +2.6 on 0775), highlights get lighter (L95 87.9 → 93.4) and photo 0775 gets lighter overall (L 53.2 → 62.8). The overall chroma of photo 0775 rises from 21.4 to 31.7.
- Green-cyan shadows. A color balance rgb instance named “film” adds a light green-cyan tint to the shadows (hue about 135°, C about 2), the cast Analog.cafe saw in its scans, which may be a scanning artifact.
- Grain. An ISO 400 color negative grain, sharp and present without being heavy.
What it leaves alone
- Your base development. The style contains no exposure, no sigmoid or filmic, no white balance and no LUT. Those settings stay as you made them.
- Your color balance rgb. The style’s color balance rgb is a separate instance named “film”: it is added next to yours, which stays untouched.
- But not your rgb primaries, color equalizer, tone curve or grain. When you apply a style from the lighttable or the darkroom, each of its modules replaces the instance of the same module with the same name, if the photo has one, and is added otherwise. These four modules carry no instance name, so they replace any settings you had already made in them. Your earlier settings remain in the history.
- Your pipeline order. The style file carries no module order list, so it does not impose one on your image.
Exporting with a style, or rendering with darktable-cli, works differently: every module of the style is added as a separate instance. Our measurements were made that way, on darktable’s default rendering. The details are in Install and apply darktable styles.
Limits
- No datasheet. The curve and the grain are estimated from reviews.
- A hypothesis. The red ↔ blue swap fits the descriptions, but the real sensitivities of the film’s layers are unknown. The matrix is a rotation of the primaries, not a true reflection of the hues, so intermediate hues (cyan, violet, pink) are poorly predicted. Saturated cyan goes to yellow-green (205° → 105°) and violet to orange (316° → 38°); the sources describe neither.
- One point on a moving target. On film, the look changes a lot with light, sky, exposure and scan. The style fixes an intermediate look, close to ISO 400.
- The sky is a flat orange. Parallax notes more contrasty clouds; that effect is not simulated.
- All skin turns equally blue. Shoot It With Film describes brown skin coping better; this nuance is not reproduced.
- Green shadows. They may be a scanning artifact on film (Analog.cafe); the style adds them only lightly (C about 2).
- The sources disagree on contrast. Medium at Analog.cafe, strong at Parallax: the style takes the stronger contrast. They also disagree on reds, cobalt at Analog.cafe and purple at 35mmc; the style makes them purple.
Tips
- The ISO effect is not built in. Reviewers get the strongest effect at EI 400 and a calmer, less orange result at EI 100. The style fixes one look close to 400; adjust the saturation of its “film” color balance rgb instance to taste.
- Apply it early. If you plan to fine-tune the tone curve, rgb primaries, color equalizer or grain yourself, apply the style first: it would replace those settings if you made them before.
- Choose the photo. The film needs strong sun and bold colors; gray light gives flat, muddy results on film, and the style is no exception.
- Installation: see Install and apply darktable styles.
Get the preset
GA — 039 / P · darktable preset
LomoChrome Turquoise
for darktable